Build a menu
This page takes you from an empty list to a menu you can open in game. For the vocabulary (layouts, views, frames) see Understand a GUI menu.
Create a menu
There are three ways to get a menu.
- In the editor. Click + above the menu list. Give a name, pick the Typewriter page and the container type, then click Create. A name and a page are required.
- In the Typewriter web panel. Add an Open GUI entry by hand. The editor lists it after you press the refresh button.
- From the demo pack. See Demo pack and troubleshooting.
The container type in the dialog is the one the canvas draws. The choices are Barrel, Book, Shulker Box, Dispenser, Hopper, Furnace, Anvil, Brewing Stand, Enchanting Table, Grindstone, Stonecutter, Cartography Table, Loom, Beacon, Smithing Table, Crafting Table and Merchant, plus the chest sizes. The container background comes from your client jar (see Textures): without it the canvas has no vanilla background.
Menu settings
The Menu tab holds the settings of the whole menu.
- Inventory type (GUI):
CUSTOM(default),CHEST,DISPENSER,HOPPER,BREWING,FURNACE,ANVIL,BEACONorMERCHANT. - Container (canvas rendering): what the canvas draws.
- Size (slots): 9 to 54 by steps of 9 (1 to 6 rows). Shown only for the
CUSTOMtype. - Extended menu: the menu also uses the player inventory (shown when the entry has this field).
- Auto refresh (ticks, 0 = off): redraws the menu every so many ticks, which is how a placeholder stays current.
- Base menu (
baseMenuId): a template. Its layout pool merges under the menu's own, and the same id overrides. Inherited slots appear greyed on the canvas. See Views, tabs and inheritance.
Place buttons and items
- Select the menu, stay in Edit mode.
- Click an empty slot, or an existing one, on the canvas. The Slot tab shows it.
- Fill the Appearance section: Display name and Lore (one line per entry), both MiniMessage. A dynamic value is shown as "(dynamic value)" and is edited in Typewriter.
- Pick the item (material or custom item) with the item picker. The picker lists the vanilla materials, then the CraftEngine, Nexo and ItemsAdder items when those plugins are present.
- Use Repetition to fill several slots with the same button: Count, Gap, Rows and a direction (None, Right, Left, Down, Up). Details in the GUI page.
- Set the Behavior: Can be picked up, Ghost (cursor copy).
- Permission to see hides the button from players without the permission; Permission to click lets them see it but not use it.
- Press
Ctrl+S.
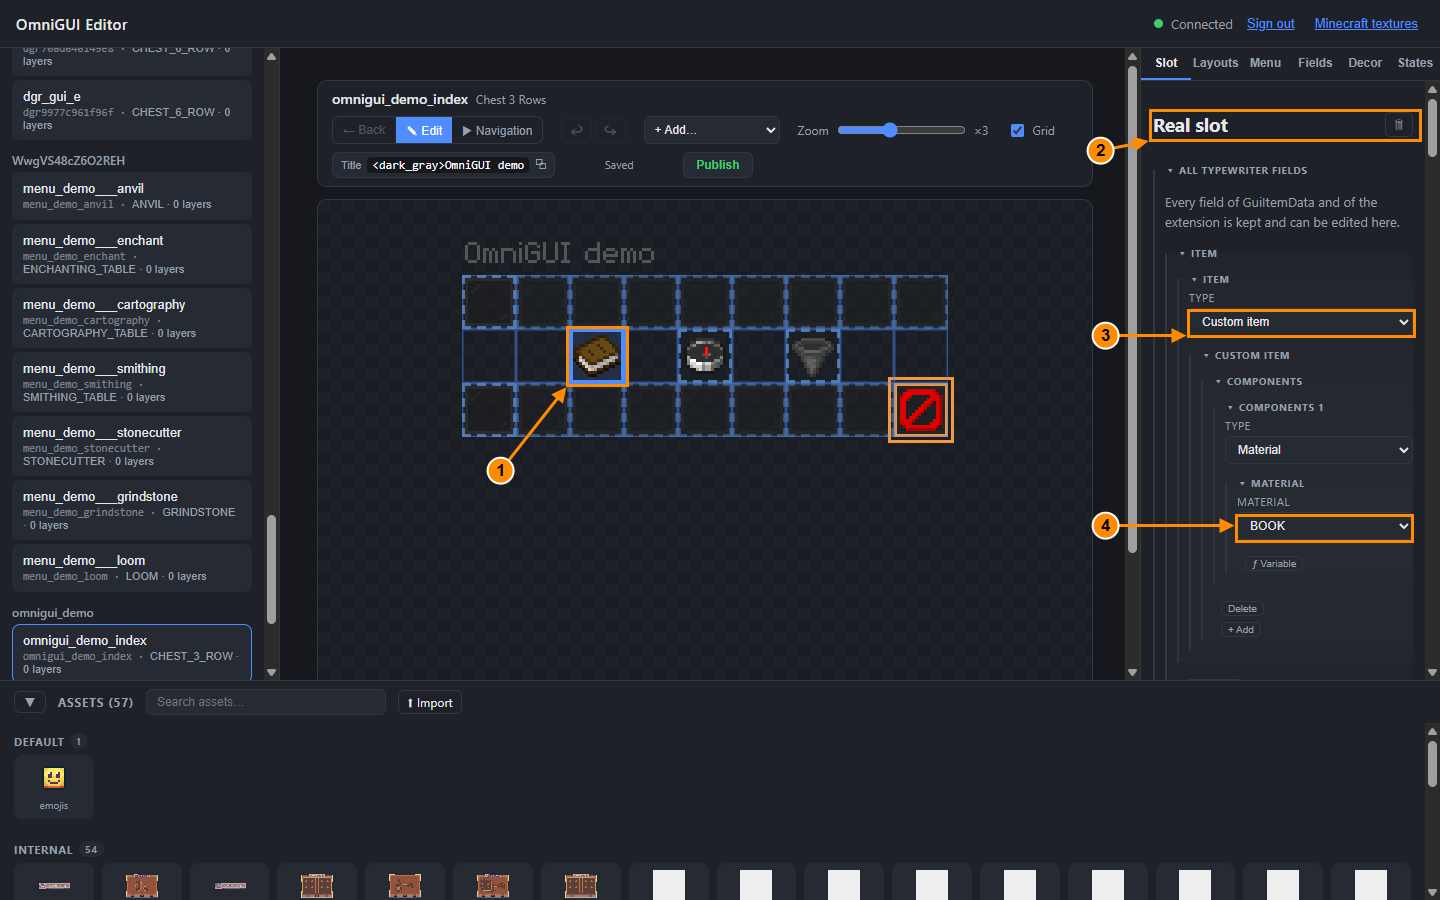
- The selected slot on the canvas.
- The Slot tab.
- Item type (here a custom item).
- Material.
Delete this slot removes it. All Typewriter fields opens every field of the slot as Typewriter shows it.
Button types
The Button type list gives a slot a role: None (static slot), a type from the registry, or Free id... for any id defined by a configuration. A view tab is written view:<id>. Some types take a Parameter. The role of each type is in Interactions and navigation.
What a click does
The Click triggers section lists one block of actions per click type. Use Add an interaction to create a block, then add actions: commands, Typewriter triggers, Close the menu, Go back (gui:back). State transition after click moves the menu to another state (see states); the default is None (state by conditions). Command syntax and click types are in Interactions and navigation.
Button commands run in the console, so they can do anything. If a command contains a placeholder or {input}, read Placeholders: a value with a space or a special character stops the command.
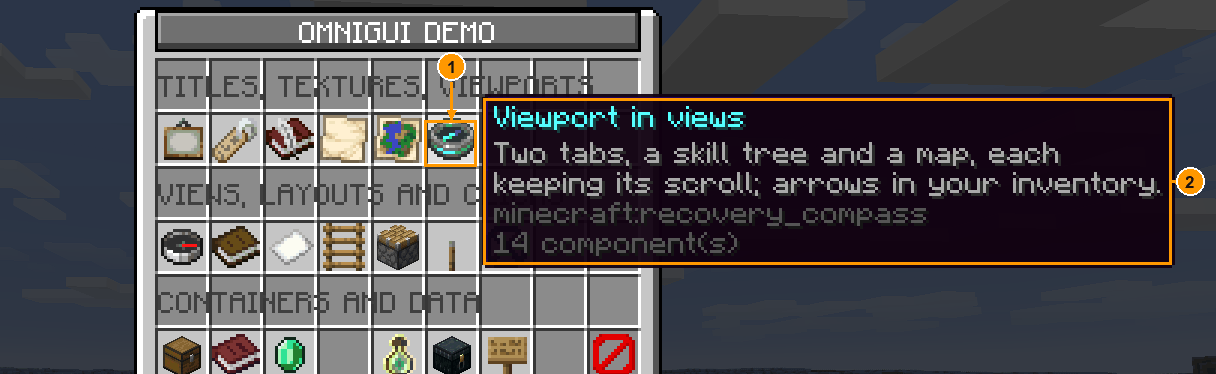
- The hovered button.
- Its tooltip: the display name and lore set in the Appearance section.
Fields
The Fields tab shows every field of the entry as the Typewriter panel does. Use it for what the editor has no dedicated control for. A blocking validation error disables Publish until you fix it.
Save, publish and test in game
Ctrl+Swrites the menu to the Typewriter staging (the badge turns to Saved).- Switch to Navigation to try hover, tabs, scrolling and clicks inside the browser. Back returns to the previous screen.
- In Navigation mode, the right panel is the test panel: Test player, Active state, simulated facts, and Test in game. The button opens the menu on your own player (message "Menu opened on your player"). It needs a session opened with the one-time link; a token session names no player and cannot test.
- Publish applies the staging. See Save, publish and staging.
- In game, open the menu with its trigger (for example
/tw trigger <entry> <player>).
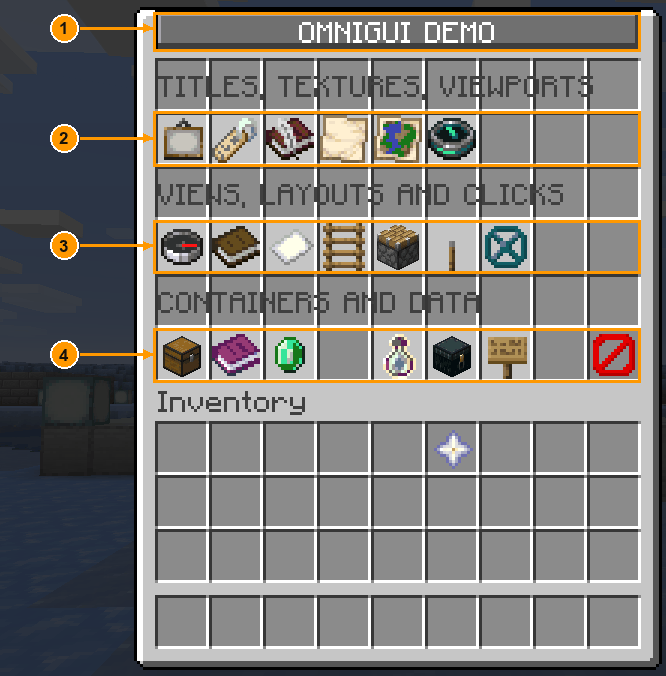
- to 4. The four buttons of the index, each opening a family of demo menus.
Titles, panels and scrolling windows are in Titles, nine-patch and viewports.